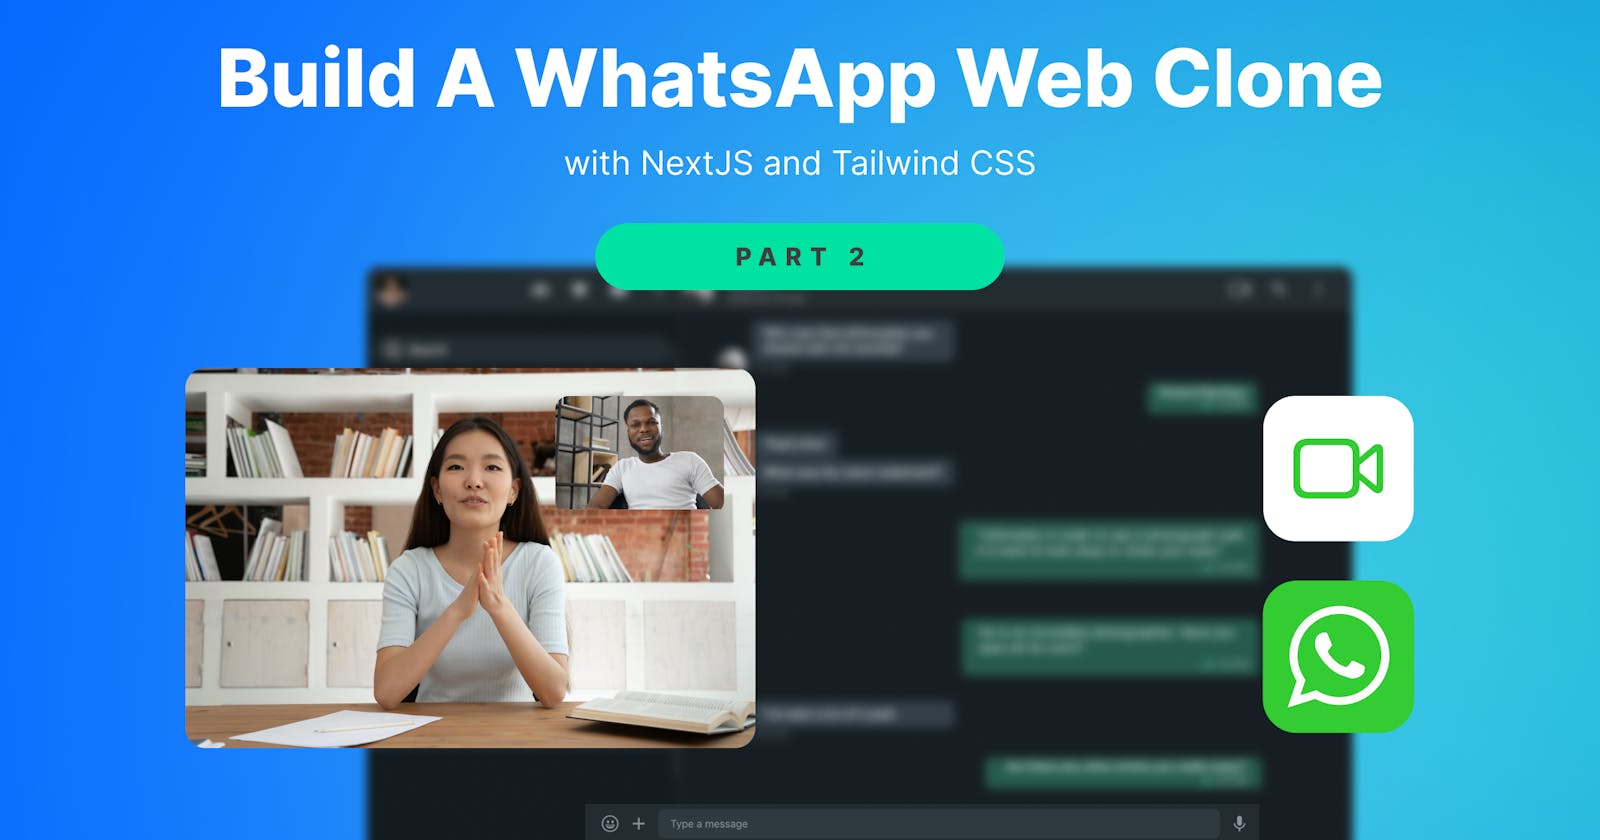


Let's Add Video Calling! 📞
After a recent update to WhatsApp, users can now call each other directly from the web and desktop clients. In the previous part of this article series, we implemented a chat feature resembling WhatsApp chat using Stream’s Chat SDK, we used Supabase to quickly get user authentication going and focussed most of our effort on making sure our implementation resembles WhatsApp.
In this part of the series, we want to take our project to the next level by adding user-to-user calling using the Stream Video Calling API. When using WhatsApp it is straightforward to step into a video call right from the chat you are having. Using Stream’s Video SDK and UI components, we can get a similar user experience set up fast. Without a ready-to-use video calling API, we would have to create and configure our backend infrastructure, which can prove challenging when reliability, performance, and scale are all required.
Our code here is mostly based on the existing React Chat Integration Guide but we will be making a few customizations along the way to make things look more like WhatsApp.
Let’s start where we left off in Part 1 of this series.
First, we need to add Stream Video as a dependency:
npm install @stream-io/video-react-sdk stream-chat-react stream-chat
We will also need to install sass, this will allow NextJS to compile and use some SASS-based templates taken directly from Stream’s React Chat Integration Guide.
npm install sass
This will be a lot of code, but I will explain things as we go.
We first need to create a number of components and assets. These components are what tie our Chat and Video services together.
Create a file in the directory app/hooks named useDragable.ts
The contents should be:
import { useEffect, useRef } from 'react';

const throttle = <T>(fn: (arg: T) => void, delay: number) => {
  let time = Date.now();

  return (arg: T) => {
    if (time + delay - Date.now() <= 0) {
      fn(arg);
      time = Date.now();
    }
  };
};
export const useDraggable = (element?: HTMLElement | null) => {
  const dragStart = useRef<{ x: number; y: number } | null>(null);

  useEffect(() => {
    if (!element) return;

    const handleMouseDown = (event: MouseEvent) => {
      if (!(event.button === 0 && event.buttons === 1)) return;
      const { left, top } = element.getBoundingClientRect();
      dragStart.current = { x: event.clientX - left, y: event.clientY - top };
    };

    const handleMouseUp = () => {
      document.removeEventListener('mousemove', handleDrag);
      dragStart.current = null;
    };
    const handleDrag = (event: MouseEvent) => {
      if (!dragStart.current) return;
      const deltaX = event.pageX - dragStart.current.x;
      const deltaY = event.pageY - dragStart.current.y;
      element.style.left = deltaX + 'px';
      element.style.top = deltaY + 'px';
    };

    element.addEventListener('mousedown', handleMouseDown);
    document.addEventListener('mouseup', handleMouseUp);
    document.addEventListener('mousemove', throttle(handleDrag, 100));

    return () => {
      element.removeEventListener('mousedown', handleMouseDown);
      document.removeEventListener('mouseup', handleMouseUp);
      document.removeEventListener('mousemove', handleDrag);
    };
  }, [element]);
};
The aboce listing creates a helper object allowing an on screen element to be dragged and move within the browser window. We will use this component later in our project.
Next, we need to expose this file’s interface. We do this by creating a file next to it called index.ts.
export * from './useDraggable';
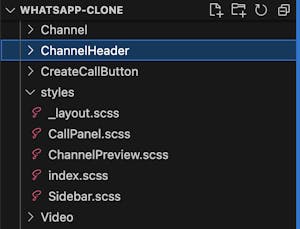
To build our intended user interface, we need to create customized versions of 5 UI components provided by the Stream Video SDK.
CreateCallButton
All these components are related. The Video component contains the Channel component, the Channel contains the ChannelHeader component, and the ChannelHeader contains the CreateCallButton. It’s pretty straightforward when you see the result.
Let’s begin with the CreateCallButton. This component will display a button in the UI that will initiate a video call. This component also contains a lot of the logic related to enabling Stream’s Video SDK. Create a file named CreateCallButton.ts in the directory components/CreateCallButton.
The code should looks similar to this:
import { useCallback } from 'react';
import {
  MemberRequest,
  useStreamVideoClient,
} from '@stream-io/video-react-sdk';
import { useChannelStateContext } from 'stream-chat-react';
import { customAlphabet } from 'nanoid';

const nanoid = customAlphabet(
  'ABCDEFGHIJKLMNOPQRSTUVWXYZabcdefghijklmnopqrstuvwxyz0123456789',
  10,
);

import type { LiteralStringForUnion, UR } from 'stream-chat';
import { User } from '@stream-io/video-react-sdk';

export type AttachmentType = UR;
export type ChannelType = UR & { subtitle?: string };
export type CommandType = LiteralStringForUnion;
export type EventType = UR;
export type MessageType = UR;
export type ReactionType = UR;
export type UserType = Omit<User, 'type'>;

export type StreamChatType = {
  attachmentType: AttachmentType;
  channelType: ChannelType;
  commandType: CommandType;
  eventType: EventType;
  messageType: MessageType;
  reactionType: ReactionType;
  userType: UserType;
};

export function meetingId(length = 12) {
  return nanoid(length);
}
export const CreateCallButton = () => {
  const videoClient = useStreamVideoClient();
  const { channel } = useChannelStateContext<StreamChatType>();

  const createCall = useCallback(() => {
    videoClient
      ?.call('default', meetingId())
      .getOrCreate({
        ring: true,
        data: {
          custom: {
            channelCid: channel.cid,
          },
          members: Object.values(channel.state.members).map<MemberRequest>(
            (member) => ({
              user_id: member.user_id!,
            }),
          ),
        },
      })
      .then((call) => {
        console.log('call', call);
      });
  }, [videoClient, channel.cid, channel.state.members]);

  const disableCreateCall = !videoClient;
  return (
    <button
      className="rmc__button rmc__button--green"
      disabled={disableCreateCall}
      onClick={createCall}
    >
      <span>Start a call</span>
    </button>
  );
};
We need to create an index.ts file next to the file we created as well. Make it look as follows:
export * from './CreateCallButton';
Let’s move on to the ChannelHeader. The ‘ChannelHeader’ is adjusted to act as a container for the CreateCallButton and display metadata like an avatar image and user name. Create a file ChannelHeader.ts in the directory components/ChannelHeader.
This one should look something like this:
import React from 'react';
import {
  Avatar,
  useChannelPreviewInfo,
  useChannelStateContext,
  useChatContext,
  useTranslationContext,
} from 'stream-chat-react';

import type { StreamChatType } from '../../types/chat';
import { CreateCallButton } from '../CreateCallButton';

export type ChannelHeaderProps = {
  /** Manually set the image to render, defaults to the Channel image */
  image?: string;
  /** Show a little indicator that the Channel is live right now */
  live?: boolean;
  /** Set title manually */
  title?: string;
};

export const MenuIcon = () => (
  <svg
    data-testid="menu-icon"
    viewBox="0 0 448 512"
    xmlns="http://www.w3.org/2000/svg"
  >
    <title>Menu</title>
    <path
      d="M0 88C0 74.75 10.75 64 24 64H424C437.3 64 448 74.75 448 88C448 101.3 437.3 112 424 112H24C10.75 112 0 101.3 0 88zM0 248C0 234.7 10.75 224 24 224H424C437.3 224 448 234.7 448 248C448 261.3 437.3 272 424 272H24C10.75 272 0 261.3 0 248zM424 432H24C10.75 432 0 421.3 0 408C0 394.7 10.75 384 24 384H424C437.3 384 448 394.7 448 408C448 421.3 437.3 432 424 432z"
      fill="currentColor"
    />
  </svg>
);

const UnMemoizedChannelHeader = (props: ChannelHeaderProps) => {
  const { image: overrideImage, live, title: overrideTitle } = props;

  const { channel, watcher_count } =
    useChannelStateContext<StreamChatType>('ChannelHeader');
  const { openMobileNav } = useChatContext<StreamChatType>('ChannelHeader');
  const { t } = useTranslationContext('ChannelHeader');
  const { displayImage, displayTitle } = useChannelPreviewInfo({
    channel,
    overrideImage,
    overrideTitle,
  });

  const { member_count, subtitle } = channel?.data || {};

  return (
    <div className="str-chat__header-livestream str-chat__channel-header">
      <button
        aria-label="Menu"
        className="str-chat__header-hamburger"
        onClick={openMobileNav}
      >
        <MenuIcon />
      </button>
      <Avatar
        image={displayImage}
        name={displayTitle}
        shape="rounded"
        size={channel?.type === 'commerce' ? 60 : 40}
      />
      <div className="str-chat__header-livestream-left str-chat__channel-header-end">
        <p className="str-chat__header-livestream-left--title str-chat__channel-header-title">
          {displayTitle}{' '}
          {live && (
            <span className="str-chat__header-livestream-left--livelabel">
              {t<string>('live')}
            </span>
          )}
        </p>
        {subtitle && (
          <p className="str-chat__header-livestream-left--subtitle">
            {subtitle}
          </p>
        )}
        <p className="str-chat__header-livestream-left--members str-chat__channel-header-info">
          {!live && !!member_count && member_count > 0 && (
            <>
              {t('{{ memberCount }} members', {
                memberCount: member_count,
              })}
              ,{' '}
            </>
          )}
          {t<string>('{{ watcherCount }} online', {
            watcherCount: watcher_count,
          })}
        </p>
      </div>
      <CreateCallButton />
    </div>
  );
};

/**
 * The ChannelHeader component renders some basic information about a Channel.
 */
export const ChannelHeader = React.memo(
  UnMemoizedChannelHeader,
) as typeof UnMemoizedChannelHeader;
And again an index.ts file is required.
export * from './ChannelHeader';
Now, let’s focus our attention on creating a channel view.
Create the file Channel.tsx in the directory components/Channel.
This file should look as follows:
import {
  Channel as StreamChatChannel,
  MessageInput,
  MessageList,
  Thread,
  Window,
} from 'stream-chat-react';
import { CustomEventComponent } from '../CustomEventComponent';
import { ChannelHeader } from '../ChannelHeader';

export const Channel = () => (
  <StreamChatChannel MessageSystem={CustomEventComponent}>
    <Window>
      <ChannelHeader />
      <MessageList />
      <MessageInput focus />
    </Window>
    <Thread />
  </StreamChatChannel>
);
Not too bad, right? We already did most of the work in the code we wrote earlier.
Make sure to add this implementation as an export as well. Create the file index.ts next to the Channel file.
export * from './Channel';
And finally, we need to add the Video component. Create a file called Video.tsx in Components/Video The Video component will contain the actual video call being performed by the Stream SDK. So, there is some logic involved with call state management.
import { StreamCall, useCalls } from '@stream-io/video-react-sdk';

import {
  CallingState,
  CancelCallButton,
  PaginatedGridLayout,
  RingingCall,
  ScreenShareButton,
  SpeakingWhileMutedNotification,
  ToggleAudioPublishingButton,
  ToggleVideoPublishingButton,
  useCall,
  useCallStateHooks,
} from '@stream-io/video-react-sdk';
import { useChatContext } from 'stream-chat-react';
import { useState } from 'react';
import { useDraggable } from '../../app/hooks';

const CallPanel = () => {
  const call = useCall();
  const { useCallCallingState, useCallCustomData } = useCallStateHooks();
  const callingState = useCallCallingState();
  const customData = useCallCustomData();
  const { channel: activeChannel } = useChatContext();
  const [panelElement, setPanelElement] = useState<HTMLDivElement | null>(null);
  useDraggable(panelElement);

  if (!call) return null;

  const callingToActiveChannel = activeChannel?.cid === customData.channelCid;
  if (CallingState.RINGING === callingState && !callingToActiveChannel)
    return null;

  if (callingState === CallingState.JOINED) {
    return (
      <div
        className="str-video__call-panel rmc__call-panel-wrapper"
        ref={setPanelElement}
      >
        <PaginatedGridLayout groupSize={4} />
        <div className="rmc__active-call-controls">
          <ScreenShareButton />
          <SpeakingWhileMutedNotification>
            <ToggleAudioPublishingButton />
          </SpeakingWhileMutedNotification>
          <ToggleVideoPublishingButton />
          <CancelCallButton />
        </div>
      </div>
    );
  } else if (
    [CallingState.RINGING, CallingState.JOINING].includes(callingState)
  ) {
    return (
      <div className="rmc__call-panel-wrapper" ref={setPanelElement}>
        <RingingCall />
      </div>
    );
  }

  return null;
};


export const Video = () => {
  const calls = useCalls();
  return (
    <>
      {calls.map((call) => (
        <StreamCall call={call} key={call.cid}>
          <CallPanel />
        </StreamCall>
      ))}
    </>
  );
};
And again, we need an index.ts, with a single export.
export * from './Video';
That was a lot of code, but we are nearly there. Before we move towards integrating our Video component, let’s ensure it’ll all look somewhat decent.
Create a directory called styles in the components directory. In that directory, we need to add five files.
_layout.scss
body {
  margin: 0;
  font-family: -apple-system, BlinkMacSystemFont, 'Segoe UI', 'Roboto', 'Oxygen', 'Ubuntu',
  'Cantarell', 'Fira Sans', 'Droid Sans', 'Helvetica Neue', sans-serif;
  -webkit-font-smoothing: antialiased;
  -moz-osx-font-smoothing: grayscale;
}

code {
  font-family: source-code-pro, Menlo, Monaco, Consolas, 'Courier New', monospace;
}

html,
body {
  margin: unset;
  padding: unset;
  height: 100%;
  width: 100%;
}

#root, .main-container {
  display: flex;
  width: 100%;
  height: 100%;
}


.str-chat-channel-list {
  position: fixed;
  z-index: 1;
  width: 0;

  &--open {
    width: 100%;
  }
}

.str-chat-channel {
  width: 100%;
}

.str-chat__thread {
  width: 100%;
  height: 100%;
  position: fixed;
  z-index: 1;
}

.str-chat__channel-header .str-chat__header-hamburger {
  width: 30px;
  height: 30px;
  display: flex;
  align-items: center;
  justify-content: center;
  cursor: pointer;
  border: none;
  background: transparent;

  svg {
    width: 25px;
    height: 25px;
  }

  &:hover {
    svg path {
      fill: var(--primary-color);
    }
  }
}

@media screen and (min-width: 768px) {
  .str-chat-channel-list {
    width: 100%;
    max-width: 420px;
    position: initial;
    z-index: 0;
  }

  .str-chat__thread {
    position: initial;
    z-index: 0;
  }

  .str-chat__channel-header .str-chat__header-hamburger {
    display: none;
  }
}

@media screen and (min-width: 1024px) {
  .str-chat__thread {
    width: 45%;
  }

  .str-chat__channel-header .str-chat__header-hamburger {
    display: none;
  }
}
CallPanel.scss
.rmc__call-panel-wrapper {
  position: absolute;
  top: 60px;
  right: 20px;
}

.str-video__call-panel {
  height: 350px;

  .rmc__active-call-controls {
    bottom: 10px;
    display: flex;
    justify-content: center;
    gap: 10px;
  }

  .str-video__call-controls__button--variant-danger {
    height: fit-content;
  }

  .str-video__participant,
  .str-video__video-container {
    display: flex;
  }
}

.str-video__participant_details,
.str-video__notification {
  color: #fff;
}
ChannelPreview.scss
.rmc__channel-preview__call-controls {
    display: flex;
    gap: 0.5rem;

  .str-video__call-controls__button {
    display: flex;
    align-items: center;
    justify-content: center;
    width: 20px;
    height: 20px;
    padding: 0;

    .str-video__icon--call-accept {
      width: 10px;
      height: 10px;
    }

    .str-video__icon--call-end {
      width: 12px;
      height: 12px;
    }
  }
}
SideBar.scss
#sidebar {
  display: flex;
  flex-direction: column;
  border-inline-end: var(--str-chat__channel-list-border-inline-end);

  .str-chat__channel-list {
    border: none;
  }

  .rmc__button--logout {
    svg {
      rotate: 180deg;
    }
  }
}

#sidebar-footer {
  display: flex;
  width: 100%;
  padding: 0.5rem;
}
And finally, index.scss
@layer default-chat-sdk {
  @import 'stream-chat-react/dist/scss/v2/index.scss';
}

@import '@stream-io/video-react-sdk/dist/css/styles.css'
  layer(default-video-sdk);

@import 'layout';
@import './CallPanel.scss';
@import './ChannelPreview.scss';
@import './Sidebar.scss';
The final thing we need to do is integrate the Video components into the WhatsAppComponent we created earlier.
So open up the file components/WhatsAppChat.tsx.
Start with modifying the imports at the top of the file.
Replace all existing imports with the following.
import { useEffect, useState } from 'react';

import { StreamChat, ChannelSort, ChannelFilters } from 'stream-chat';
import { ChannelList, Chat } from 'stream-chat-react';

import { Channel } from './Channel';
import {
  StreamTheme,
  StreamVideo,
  StreamVideoClient,
} from '@stream-io/video-react-sdk';

import { Video } from './Video';
import '@stream-io/video-react-sdk/dist/css/styles.css';
import './layout.css';
import './styles/index.scss';

import { User } from '@supabase/supabase-js';
import ChannelListHeader from './ChannelListHeader';
Right below the declaration of the const chatClient = … add a line declaring a useState variable.
const [videoClient, setVideoClient] = useState<StreamVideoClient>();
Right after calling connectUser on the chatClient (should be somewhere around line 52), add the creation of a StreamVideoClient.
      await chatClient.connectUser({ id: userId }, response.userToken);

      // Insert after this line
      const _videoClient = new StreamVideoClient({
        apiKey,
        user: chatUser,
        token: response.userToken,
      });

      await _videoClient.connectUser({ id: userId }, response.userToken);

      setVideoClient(_videoClient);

      // And make sure the following line is after the setting of the video client.
      setIsLoading(false);
And finally, we replace this bit of code:
      {!isLoading && (
        <div id="root">
          <Chat client={chatClient}>
            <div className="channel-list-container">
              <ChannelListHeader user={chatUser} />
              <ChannelList sort={sort} filters={filters} showChannelSearch />
            </div>
            <Channel>
              <Window>
                <ChannelHeader />
                <MessageList />
                <MessageInput />
              </Window>
              <Thread />
            </Channel>
          </Chat>
        </div>
      )}
Replace it with this:
      {!isLoading && videoClient && (
        <div id="root">
          <Chat client={chatClient}>
            <StreamVideo client={videoClient}>
              <StreamTheme as="main" className="main-container">
                <div className="channel-list-container">
                  <ChannelListHeader user={chatUser} />
                  <ChannelList
                    sort={sort}
                    filters={filters}
                    showChannelSearch
                  />
                </div>
                <Channel />
                <Video />
              </StreamTheme>
            </StreamVideo>
          </Chat>
        </div>
      )}
WhatsApp Calling example.
Moving Onward to Deployment
In part two of this article series we covered how to add video calling to the chat application we built in part 1. You can see how powerful Stream’s UI components are, and how straightforward they are to integrate into a project.
In part 1 you learned how easy it is to add chat to a product, and how quickly we could implement an authentication layer using Supabase’s authentication feature.
If you enjoyed this article, please drop a ⭐️ star ⭐️on the sample GitHub repository.
To learn more about Stream’s Video product, click here.
And remember, you will need a trial account sign-up to get started using Stream. If you followed along with this article series, you already have created an account with Stream. But, in case you haven’t, Stream provides powerful UI components and infrastructure to build any chat and video use case you can dream of. You can add reliable and scalable chat and/or video to your project in about a week instead of months. Most importantly, by using Stream’s Chat and Video, you are relying on our global edge network, providing a reliable, scalable infrastructure suitable for any scale.
We also have a Maker account available for small projects and non-commercial projects.
We have created a nice codebase, we can run this locally. But what about showing it to the world? Let’s look into deployment next. In part 3 of this article series we will look at deploying our project to Vercel. Vercel is the creator and maintainer of the NextJS framework, and their infrastructure is perfectly suitable to deploying a cloud API based project like our WhatsApp clone.
So let’s look at deployment in part 3.